This is a long post, be prepared! Someone asked for a step-by-step of a painting, and that sounded like fun, so here goes:
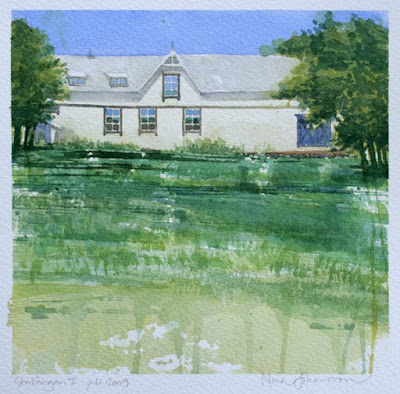
This is another painting of the stable in my last post, but from a slightly different angle. In this one I used some experimental techniques where I both print and paint the watercolours onto the paper. I like the unpredictable results of this, plus it takes away the fear of making mistakes on the expensive paper. The printing part is a bit uncontrollable so mistakes WILL occur, but they will probably not matter much in the end. Sort of a relaxing thought.
The first two pics show my setup and painting gear. This is NOT what I bring for sketching in my sketchbooks, since it is rather bulky stuff. I use this for paintings only.

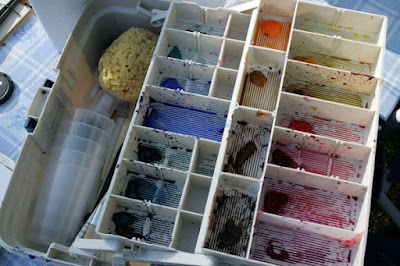
I start out with a light pencil drawing of the building, just so I know where it goes in the painting. (Sometimes I start by "ruining" the paper with some printing, and THEN decide where the main motive will go.) I draw this either on location or from my own photos. I live very close to this place, so it´s easy to bring the paint board to draw on location.

This time I start with painting the sky, choosing a rather saturated blue - it will look much lighter when it´s dry, so I´m not too worried about using too much colour.

Then the fun begins: I choose a piece of wood (or masonite, or corrugated cardboard, or whatever I find lying around) and paint LOTS of wet colour onto it, then quickly turn it upside down and press it onto the paper. I lift it up, and if it looks good I go on to the next print, otherwise I might add more paint to this piece of wood, move it slightly sideways and print again.

When I´ve done two prints with two different wood pieces, I add some uneven strokes to the top of the print - giving a sense of grass or bushes.

When the first prints are dry, I find this very uneven piece of wood, which will probably give some interesting textures, so I print that on top of the other print, with a slightly darker colour. I also add a very light warm wash to the wall of the building.

I go on printing in layers, letting every layer dry before adding the next. If too much paint ends up in a puddle, I turn the paper to a standing position and hit the table with it to make the paint run off the paper downwards (or sideways). Makes the puddles go away, and leaves nice running marks, which I like a lot. I start building up some shadow under the edge of the roof.

Then it´s time to start painting the trees too, using both a sponge and a paintbrush. I don´t want to leave any surface of the paper blank until the end, I kind of want to be working on the whole surface the whole time. I think it´s easier to find balance in contrasts and colours working that way.

I start adding some details to the building, using paintbrushes. I deepen the shadow under the roof a little too. I like this contrast between splashy experimental style and detailed controlled painting.

Then I go on with more details on the house, adding the mirroring in the window panes and some details on the blue doors. I keep on working on the grass too, both printing and painting with an uneven paintbrush.

In the end I add some darker greens to the trees, and some shadow under them.

Pretty much finished. Here without the tape around the edges. You can see it leaked through a little on the left edge. No big deal, I think.
 20 x 20 cm, pencil and watercolours on Saunders Waterford watercolour paper.